
Sunday, June 2, 2013
new jeans
Friday, May 31, 2013
self watering planter

I didn't take any step by step pictures, but it's pretty easy to follow.
I cut a wine bottle using the nail polish remover and fire method, then turned the top part upside down and rested it in the bottom.
Then I took a scrap piece of fabric and lined the inside of the neck, pulling the rest of the piece of fabric through the neck of the bottle so it would reach the water at the bottom.
Then fill the bottle with soil, add a plant, and then your plant is soaking up its own water and taking care of itself!
(For those of you that know me and plants, it's important for me to have self sustaining plants...since I can't manage to keep them alive!)
Tuesday, May 28, 2013
way behind
So, I know that I have been way behind on blogging! I was trying so hard to get a few posted a week, but life caught up with me!!
We are currently in the Illinois/Indiana area, visiting family and friends. It's both fun and hectic, since we are driving all over the place to try to see everyone.
We've already visited my older sister in Indianapolis, which was a blast. My younger sister was also able to join us, so all three of us got to hang out for awhile, which hardly ever happens!
I'll try to get a couple of my most recent projects blogged about while I'm on the road and will keep you posted on how the trip is going!
Saturday, April 13, 2013
new belgium brewery tour

Alex and I and a few friends went on a brewery tour in Fort Collins, CO. It was a free tour and really entertaining! They gave lots of free beer samples along the way, explained how they make the beer, and told us all about the kinds of beer they make. We got to see the bottling process and hear a little bit about the New Belgium Brewery as a company.
It was so much fun, and completely free! I completely recommend looking up any breweries or other companies that may offer free tours in your area.
Thursday, April 11, 2013
white chicken chili


White Chicken Chili
3 15 oz cans norther beans, drained
2 1/2 cups chopped or shredded cooked chicken
1 cup chopped onion
1 1/2 cups chopped red pepper
2 chopped jalepeno peppers
2 cloves of garlic, minced
2 tsp ground cumin
1/2 tsp salt
1/2 tsp dried oregano
3 1/2 cups chicken broth
Combine all ingredients in a crockpot. Cook on low for 8-10 hours or on high 4-5 hours. Serve with shredded cheese and tortilla chips.
Tuesday, April 9, 2013
pork with potatoes and apples

Pork with Potatoes and Apples
pork roast or pork tenderloin
2 Tbsp olive oil
2 Tbsp dried rosemary
1 onion (optional)
3 potatoes
3 apples
salt and pepper
1. Preheat oven to 450 degrees.
2. Salt and pepper the pork. Heat the oil and 1 tsp of the rosemary in a skillet on the stove and add pork. Turn to coat Arrange onion around the meat, and cook til lightly browned.
3. Transfer the pork and onions to a glass pan and put it in the oven and set a timer for 30 minutes.
4. Cube and boil the potatoes for 5 minutes. Drain, toss with olive oil, rosemary, and garlic powder (optional) and arrange around the meat.
5. After the 30 minute timer goes off, arrange the apple, also tossed in oil and rosemary, around the meat and cook for 15 more minutes.
Note: Cook in the oven longer for a bigger piece of pork, and increase apples and potatoes as desired.
Sunday, April 7, 2013
turtle brownie pie

Turtle Brownie Pie
1/2 gallon vanilla ice cream
1/2 package brownie mix
caramel sauce (to taste)
hot fudge sauce (to taste)
1/2 cups pecans (more to taste)
1. Put the ice cream in the fridge to soften. In the meantime, cook the brownie in a pie pan, as directed on the package. Cool in the fridge while preparing the ice cream.
2. Put the softened ice cream in a mixer and mix while adding caramel sauce, hot fudge, and pecans.

4. Cut and enjoy!!

Friday, April 5, 2013
jumer's cinnamon rolls

The recipe itself is pretty simple to do, but is really good!
Here are the cinnamon rolls before they went in the oven:

Here are some of them after they were baked...we were so anxious to eat them that I didn't take a picture until after we dug in!

Jumer's Cinnamon Rolls
1 tsp dry yeast
1/2 stick butter
1/2 C sugar
1 tsp cinnamon
2 1/4 C flour*
1 1/4 tsp baking powder*
1/3 C instant milk*
1 tsp salt*
1/3 C shortening (can use butter)*
1. Add pkg of yeast to 1/4 C warm water and set aside.
2. Melt butter and set aside.
3. Mix cinnamon and sugar and set aside.
4. Mix *'d ingredients and cut in Crisco. Mix in 1/2 cup cold water.
5. Add yeast and water mixture, and let sit 10 minutes.
6. Divide dough into four equal parts. Roll out each piece, brush with butter, and spoon on cinnamon/sugar mixture.
7. Roll each piece up long ways, and place them in a lightly greased pan. Every inch or so, cut a slit almost all the way through the roll.
8. Top all four rolls with extra butter and cinnamon/sugar.
9. Bake at 350 degrees for 20 minutes.
Wednesday, April 3, 2013
gradient purple nails

Overall, I think they turned out really great!
Monday, April 1, 2013
black jean/dress pants


The shoes are silver with a very small heel and a decorative buckle on the toe. They were $33 at DSW, and go well with these pants as well as jeans.
(I also mention these shoes in this post, worn with my other pair of new dress pants.)
Saturday, March 30, 2013
blueberry corn muffins

Blueberry Corn Muffins
1 C yellow (or white) cornmeal
1 C flour
3 Tbsp sugar
1 Tbsp baking powder
1/4 tsp salt
1 egg, slightly beaten
1 C milk
1/4 C vegetable oil
1 C blueberries
1. Mix dry ingredients in a large bowl. Make a well in the center.
2. In a separate bowl, mix egg, milk, and oil. Add to the well in the dry ingredients and stir until just moistened.
3. Fold in blueberries (rinsed and drained, or you can use frozen), being careful not to mash the berries.
4. Lightly grease a muffin pan and fill each cup 2/3 full. Bake for 20 minutes at 400 degrees. Brush tops with melted butter if desired.
Monday, March 25, 2013
tye dye competition shirts

My cheer girls had a competition on St Patrick's Day, and our head coach made them all green bows to wear for the occasion. Since our team colors are red and black, we as coaches didn't have anything green to wear! So another one of the coaches and I decided to make our own green shirts to wear!
I decided to tye-dye them, because I love to tye-dye things, then we used glittery gold iron-on letters to put our team initials and names on them.
All four shirts, wrapped up in spirals, ready to dye.

After putting the dye on them.

Saturday, March 23, 2013
trouser jean dress pants

They were $50 at NY&CO, and pants were buy one get one free, so I also got a pair of regular jeans as well.
The shoes are new as well. They are silver with a very small heel and a decorative buckle on the toe. They were $33 at DSW, and go well with these pants as well as jeans and black dress pants.
The pink sweater is one I've had for awhile, I think I got it at Forever 21 at least 4 years ago, but I get a good amount of wear out of it. (I wore it last Easter, in fact.)
Friday, March 22, 2013
march madness bracket

This massive board was actually made using a cardboard packing box and poster board. The box was about $1, and each piece (we used four) of poster board was $.30. The basketballs are made out of a couple sheets of orange felt, also $.30 per sheet.
The rest is just drawn on with sharpie and printed from the computer! Oh, except for the 2013, which is glitter. :)
And, did I fill out a March Madness Bracket? Yep! I used what I like to call 'Mascotology', which means that I picked who would win based on how their mascots would do against each other, or just which one I liked better!!
I've got the Syracuse Oranges for the win! (Because an orange would totally fly under the radar!!)
Wednesday, March 20, 2013
the alamo


While we were in Dallas visiting my dad, we drove down to San Antonio, TX to walk on the river walk and visit the Alamo. The river walk was really pretty, and there were restaurants and stores all along it. I could see how it's something people like to visit!
The Alamo was cool to see, but as we'd been told, pretty unimpressive. It's a lot smaller in real life than you would think it would be, but I guess when Davy Crockett and Jim Bowie were there it was a big deal!
Monday, March 18, 2013
first time at the gun range
Also while we were in Texas, we went to the gun range with my dad. We shot my uncle's Beretta, 9mm. (A small hand gun, nothing too impressive.)
I do have to say though - a trip to the gun range is pretty expensive. We went on ladies night, so it was only $5 for me to shoot, but it was $20 for the first shooter and $15 for additional shooters. Total for me, my dad, and Alex, it was $40 to shoot, before paying for ammunition or renting a gun.
Here we are with our shot up targets! Neither Alex nor I had shot handguns before, so I thought we did pretty well!

Saturday, March 16, 2013
gift of caramels
I post a lot about making caramels and my experiments with caramels. I've been looking for ways to package them a little nicer, so when I took some down to my dad as gift, this is what I came up with.

 There is a mix of chocolate covered caramels and shortbread caramels (topped in chocolate) in the box. I've been told that I should try selling them, so there will probably be more experimentation in packaging!


Thursday, March 14, 2013
boot shine in TX
We went to visit my dad in Texas for a week and went out to a bar called the Electric Cowboy, where they were offering free boot shines for ladies! Here I am with my newly shined boots! (The boot shiner was in the picture as well, but since I do not have his permission to post his picture, I cropped him out.)

Tuesday, March 12, 2013
picture collage artwork

Also, instead of using foil tape like the post, I used very thin ribbon. I did this partly because I thought it would be cheaper, and partly because I wanted it to be black, not copper foil.
The canvases are 16x20, on sale for $10 for all three of them.
I think it turned out really well - completely worth doing!
Monday, March 11, 2013
french dip sandwiches


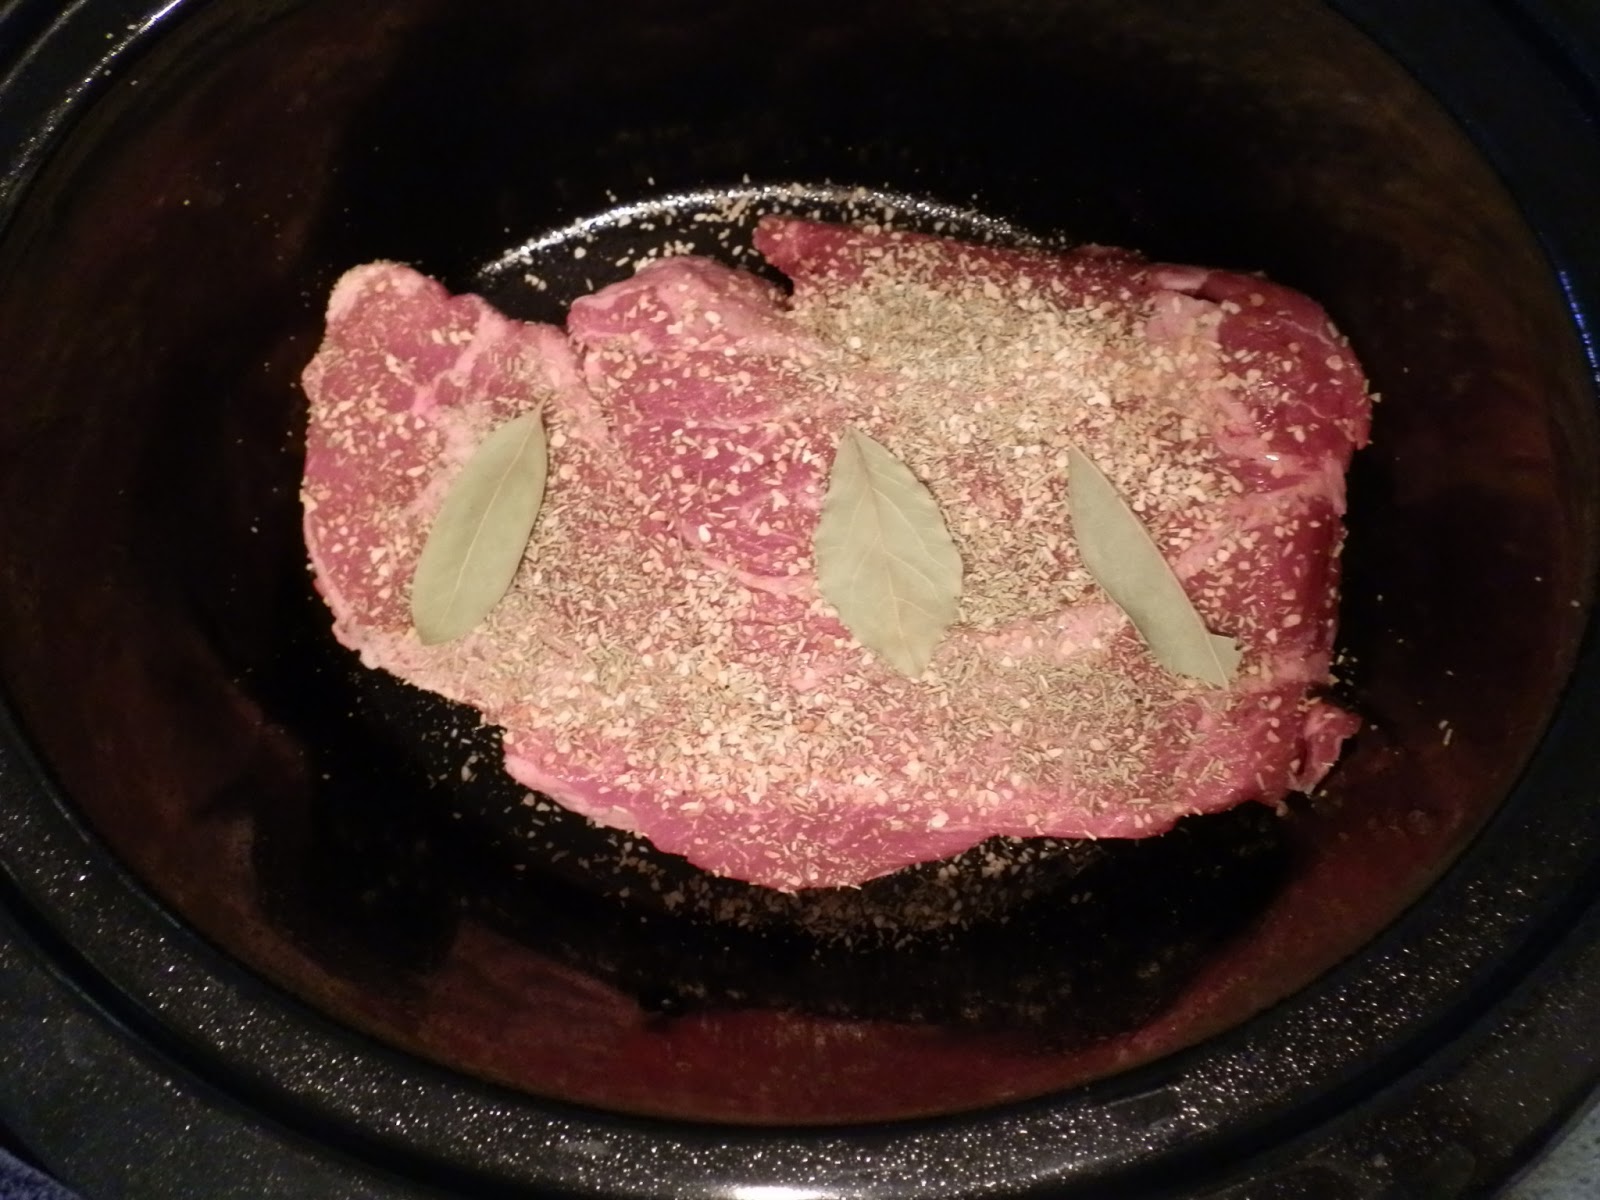

I found this recipe for French Dip Sandwiches here, and decided to give it a try. They turned out really good, although I thought they were a lot of work and kind of expensive for not too much meat. Next time, I will make this recipe will a big piece of pork, because I think this will allow the meat to soak up the flavors of the spices better and give us more meat and less fat.
French Dip Sandwiches
4 pounds beef chuck roast
1 tablespoon minced garlic
1 tablespoon dried rosemary
3 bay leaves
1 cup soy sauce
6 cups water
Place
roast in slow cooker. Season with garlic, rosemary, and bay leaves.
Pour in soy sauce and water. Cook on low setting for 6 to 10 hours.
Unlike most roasts, the longer the better.
To
serve, place in hamburger buns or split french bread and top with your
preferred cheese if desired. Feel free to dip your sandwich in the au
jus left in the slow cooker too! To make ahead/freezer meal
- Place all the ingredients except the water into a gallon sized
freezer storage bag; seal and freeze. When ready to prepare, defrost
completely. Place contents into your slow cooker and add 6 cups of
water. Cook on low setting for 6 to 10 hours. Unlike most roasts, the
longer the better.
Saturday, March 9, 2013
shortbread caramels

I found the shortbread recipe here, and used my own caramel recipe instead of the one that she used.
Shortbread recipe:
10 tbsp unsalted butter, at room temperature
1/2 cup sugar
1/2 tsp salt
1 egg yolk
1-2/3 cups flour
Line an 8×8″ pan with parchment paper, leaving some hanging over the sides to make removal easier.
In a large bowl, combine the butter, sugar, and salt with a pastry cutter or fork. Add the egg yolk and continue mixing.
Add the flour and use your hands to combine the dough until coarse crumbs form. Transfer the dough into the prepared pan and press it down into one even layer.
Refrigerate for 30 minutes. Preheat oven to 350 degrees and bake for 25 minutes, until slightly golden brown. Set aside to cool.

Then I made my own caramel and poured over the top.
As you can see, the caramel ran over the side of the shortbread quite a bit - the picture is all edge pieces! In the comments of the original blog, this seemed to be a common problem. However, I don't mind a bit of drooping, because I like the consistency of my caramels. They look like little caramel sushi rolls!
Thursday, March 7, 2013
new recliner chair

Tuesday, March 5, 2013
baking day - bread
The last couple days have been baking days! I had a lot of bread to make, and Alex wanted some more honey oatmeal rolls to take with him on a trip he's taking.
Here is the bread all rising, there are a couple pans of honey oatmeal rolls, a couple small loaves of white sourdough bread, and a loaf of wheat sourdough bread.


Sunday, March 3, 2013
teriyaki beef


Friday, March 1, 2013
tomato tortellini soup
When I have some free time, I like to make recipes that reheat well to take to lunch for work. This soup is one of my favorites because it is filling and satisfying, and really easy to pack in my lunch. It makes a lot of soup, so it should last me all week, if my husband doesn't gobble it up too!

Tomato Tortellini Soup
adapted from http://tastykitchen.com/recipes/soups/creamy-tomato-tortellini-soup/
2 whole Large Cloves Of Garlic Minced
2 Tablespoons Olive Oil
2 cans 10 3/4 Oz Cans Of Condensed Tomato Soup
1 15oz can italian diced tomatoes
1-½ cup Milk
2 cups Half-and-half
2 cups Chicken Stock
1 teaspoon Onion Powder
½ teaspoons Salt
½ teaspoons Pepper
1 teaspoon Oregano
½ teaspoons Basil
½ teaspoons Thyme
1 9 Oz Package Of Cheese Filled Tortellini
1. Saute garlic with the olive oil in a large stock pot over medium heat until golden brown. Be sure to keep an eye on it so it doesn’t get too brown or burnt.
2. When the garlic is done, add tomato soup, tomatoes, milk, half and half, chicken stock and spices. Bring to a simmer.
3. Once simmering, drop noodles into the soup. Cook according to the package directions, about 8 minutes.
4. After noodles are cooked, ladle soup into bowls and top with parmesan cheese and serve with crusty bread.
Wednesday, February 27, 2013
birthday gift for mom

Here's what I put in:
Pulled Pork Spice Rub
Santa Fe Spice Rub (source)
2 tablespoons chili powder
1 tablespoon ground cumin
1 tablespoon celery salt
1 tablespoon black pepper
1 1/2 teaspoons garlic salt
1 1/2 teaspoons dried leaf oregano, crumbled
Combine all ingredients and seal in ziploc or vacuum seal bag
(or jar) or spice jar.
Excellent in burgers, add 2 tsp per lb of meat.
Cappuccino Chocolate Chunk Muffin Mix (adapted from:source)
2 cups flour
1 cup Semi-Sweet Chocolate Chunks
1/2 cup sugar
1/2 cup finely ground coffee
2-1/2 tsp. Baking Powder
1/2 tsp. ground cinnamon
1/2 tsp. salt
To make muffins:
1 pkg mix
1 egg
1 cup milk
1/2 cup (1 stick) butter or margarine, melted.
Combine all and mix, batter will be slightly lumpy.
Spoon batter into prepared muffin pan, filling each cup 2/3 full
Bake at 375°F for 15 to 20 minutes
Monday, February 25, 2013
butternut squash soup

I immediately thought of a butternut squash soup, since that would give me a veggie at lunch, which I hardly ever eat while I am at work.
As a bonus, this soup is vegetarian, so would make a good lunch even on our meatless day.
This soup turned out really good, even though it was a little thick for my taste. I think next time if I use the whole butternut squash (which I did) I will need to increase the other ingredients so it's more soup-like and less babyfood-like.
Butternut Squash Soup
1 Butternut squash, about 2 pounds
2 tablespoons peanut oil
1 cup chopped onion
1 1/2 teaspoons chopped garlic
1/2 cup thinly sliced carrot
1/2 teaspoons ground cumin
1/2 teaspoon salt
1/2 teaspoon black pepper
1 tablespoon finely minced jalapeno pepper
2 cups chicken stock
1/4 cup heavy cream
1. Peel the squash, cut it in half, and scoop out the seeds. Cut into 1 inch pieces. In a large pot, heat oil over medium heat.
2. Add
onion and garlic and cook, stirring often, until they begin to brown,
about 5 minutes.
3. Add the carrot, cumin, salt, and pepper. Cook for 1
minute, and then add squash, jalapeno pepper, and chicken stock.
4. Bring
to a boil, reduce heat and simmer for 15- 20 minutes, or until the
vegetables are tender.
5. Remove from the heat and puree the soup using an
immersion blender, or transfer to a blender or food processor. Puree
until smooth.
6. Return to the heat, add the cream and adjust the
seasonings.
Saturday, February 23, 2013
replacement cardigan

Friday, February 22, 2013
valentine's day cookies
I know this post is a little late - I know that Valentine's Day has been over for a couple weeks, but I had to post about these cookies that a friend and I made for our Valentine's Day bake-off at work.
They are Valentine's Day and Anti-Valentine's Day cookies...because Valentine's day isn't for everyone! ;)


They are Valentine's Day and Anti-Valentine's Day cookies...because Valentine's day isn't for everyone! ;)


sugar cookie bars


They were super easy to make, and turned out delicious!
Sugar Cookie Squares
Ingredients:
1/2 cup butter, softened
1 cup granulated sugar
1 egg
1 egg white
1 Tbsp sour cream
1 tsp vanilla extract
2 1/2 cups all-purpose flour
1/2 tsp baking powder
1/2 tsp salt
1 recipe vanilla frosting, recipe follows
Preheat oven to 375 degrees. Butter a 13″ x 9″ baking dish, set
aside. In a mixing bowl combine flour, baking powder and salt, set
aside. In the bowl of an electric mixer, whip together butter and sugar
until pale and fluffy about 3-4 minutes. Stir in egg and egg white. Add
sour cream and vanilla and mix until blended. Slowly add dry mixture and
stir until well combine. With buttered hands, gently press (so gently
almost patting) mixture into buttered baking dish. Bake 16 – 19 minutes
until toothpick inserted into the center comes out clean and edges are
lightly golden. Cool completely, then frost and cut into squares.
Vanilla Frosting
Ingredients:
1/4 cup unsalted butter, softened
2 cups powdered sugar
2-3 Tbsp half and half
1 tsp vanilla
Pinch of salt
Several drop food coloring (optional)
In a mixing bowl, with an electric mixer, whip together butter and
powdered sugar and half and half until fluffy. Stir in vanilla and salt.
Add in optional food coloring and mix until well blended.
You can find the original recipe at: http://www.makeaheadmealsforbusymoms.com/sugar-cookie-squares/
Subscribe to:
Posts (Atom)